Edit your bot connection
The following procedure describes how you can edit your bot connection.
To edit your bot connection:
-
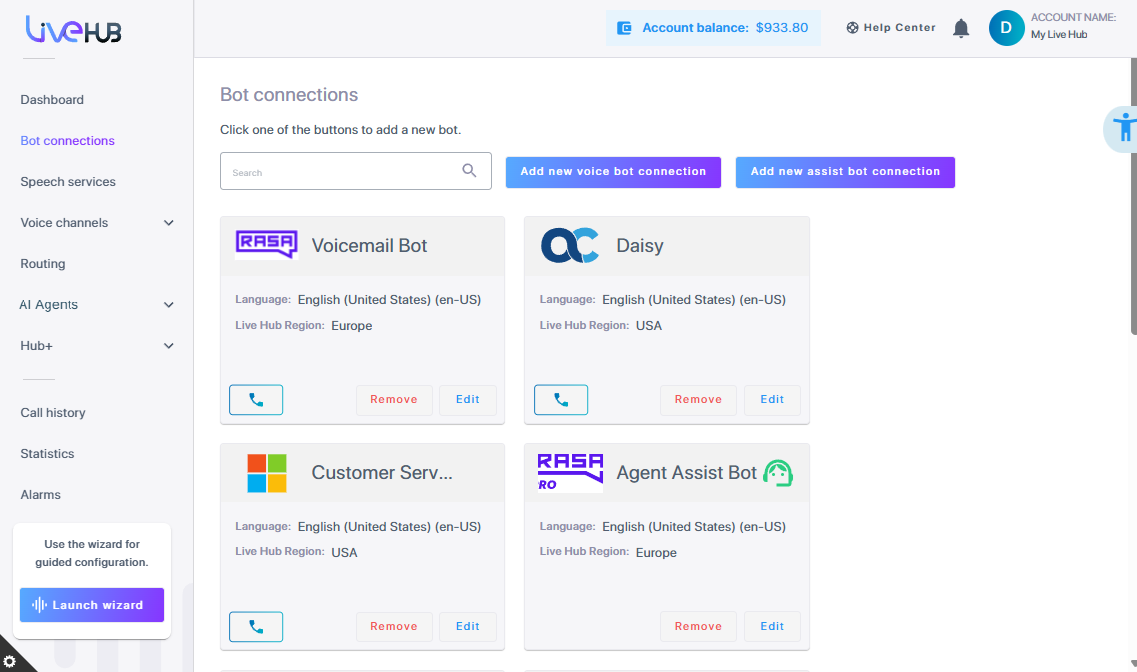
In the Navigation pane, select Bot connections.
-
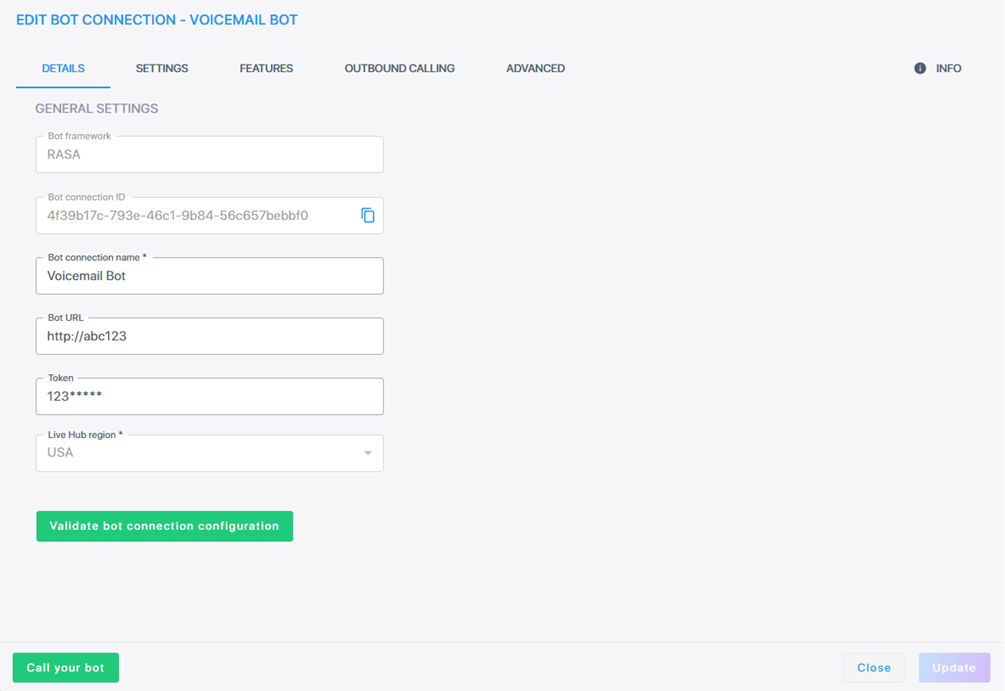
Click the Edit button corresponding to the bot that you want to edit; the Edit Bot dialog box appears with the Details tab selected.
-
You can modify the following:
-
In the 'Bot connection name' field, change the name of the bot connection if required.
-
In the 'Bot URL' field, change the name of the bot connection URL.
-
You can copy the Bot ID, by clicking ![]() .
.
-
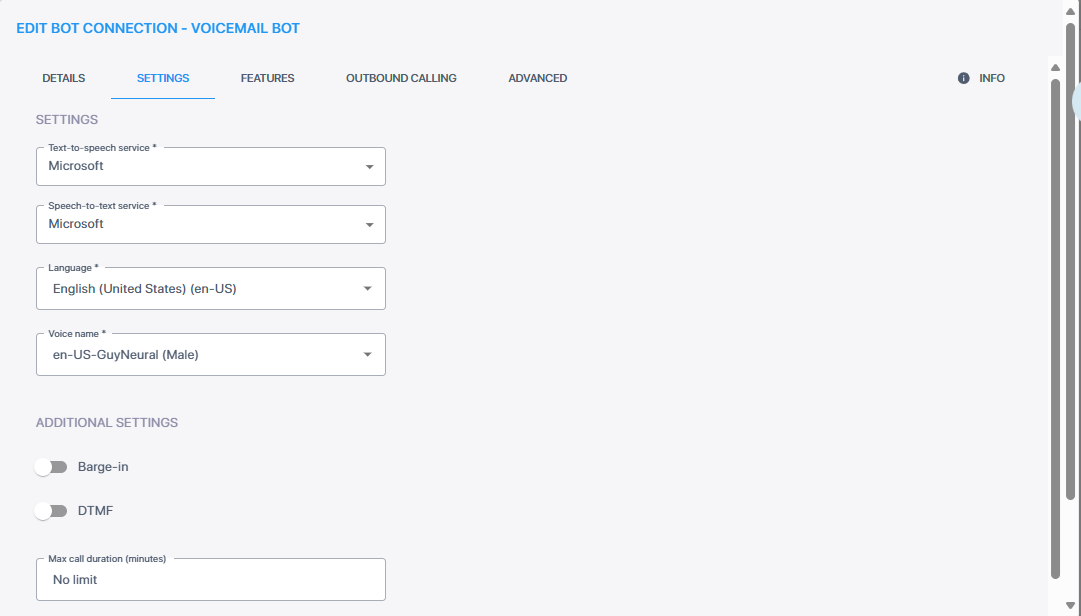
Click the Settings tab.
If you're editing a bot using the AudioCodes API framework, you can switch the interaction type between the Chat API and the Streaming API. If you select the Streaming API, you must also enable voice streaming in the Settings tab.
Update Speech-to-Text service configuration
Refer to the sections below for instructions on updating your speech‑to‑text service. When done, continue to Update Text-to-Speech service.
Microsoft
-
From the 'Speech-to-text service' drop-down list, select Microsoft.
-
From the 'Language' drop-down list, select the appropriate language.
Google V1
-
From the 'Speech-to-text service' drop-down list, select Google V1.
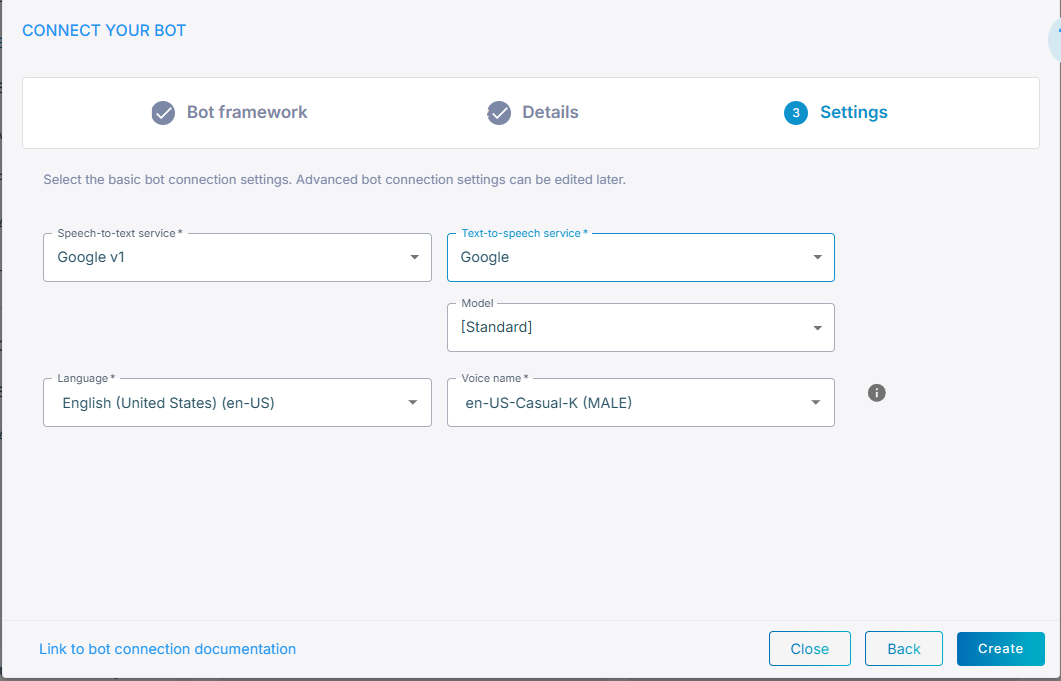
-
From the 'Language' drop-down list, select the appropriate language.
Google V2
-
From the 'Speech-to-text service' drop-down list, select Google V2.
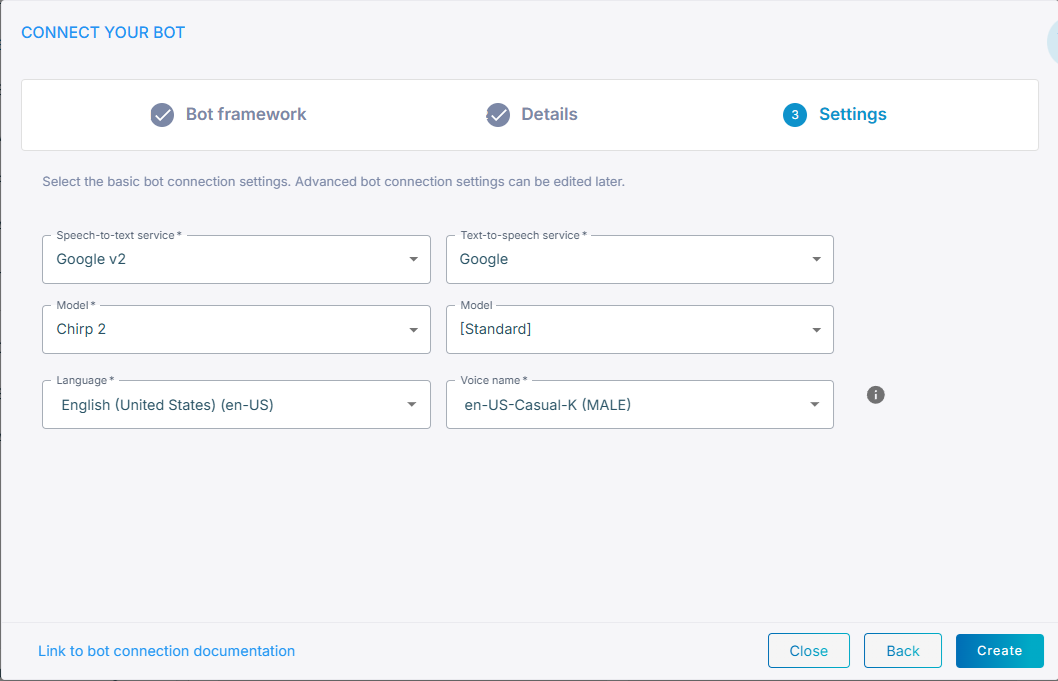
-
From the 'Model' drop-down list, select the speech recognition model (for example, Chirp 2).
-
From the 'Language' drop-down list, select the appropriate language.
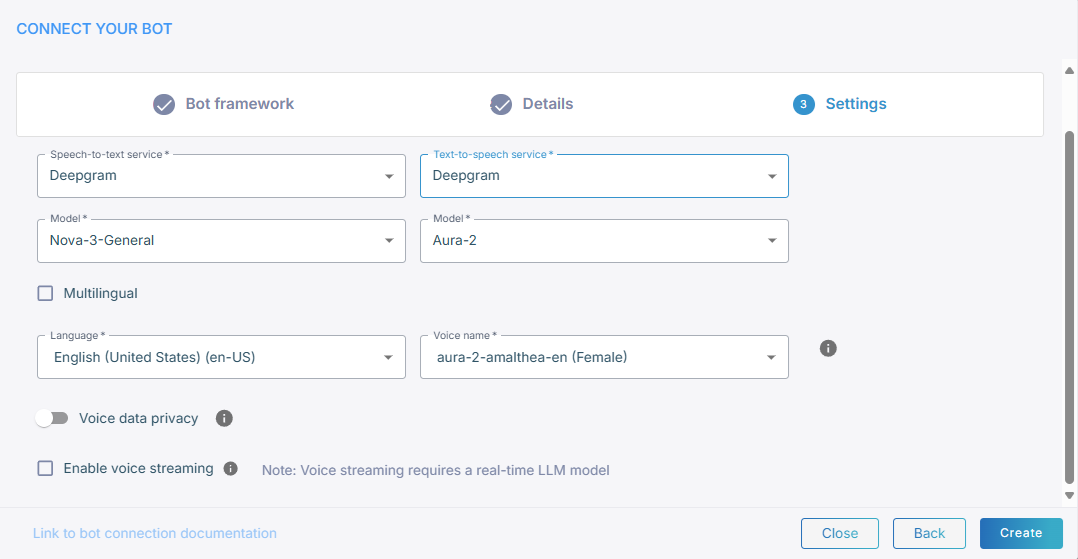
Deepgram
-
From the 'Speech-to-text service' drop-down list, select Deepgram.
-
From the 'Model' drop-down list, select the speech recognition model (for example, Nova-3-General).
ElevenLabs
-
From the 'Speech-to-text service' drop-down list, select ElevenLabs.

-
From the 'Model' drop-down list, select speech recognition model (for example, Scribe V2 Realtime).
-
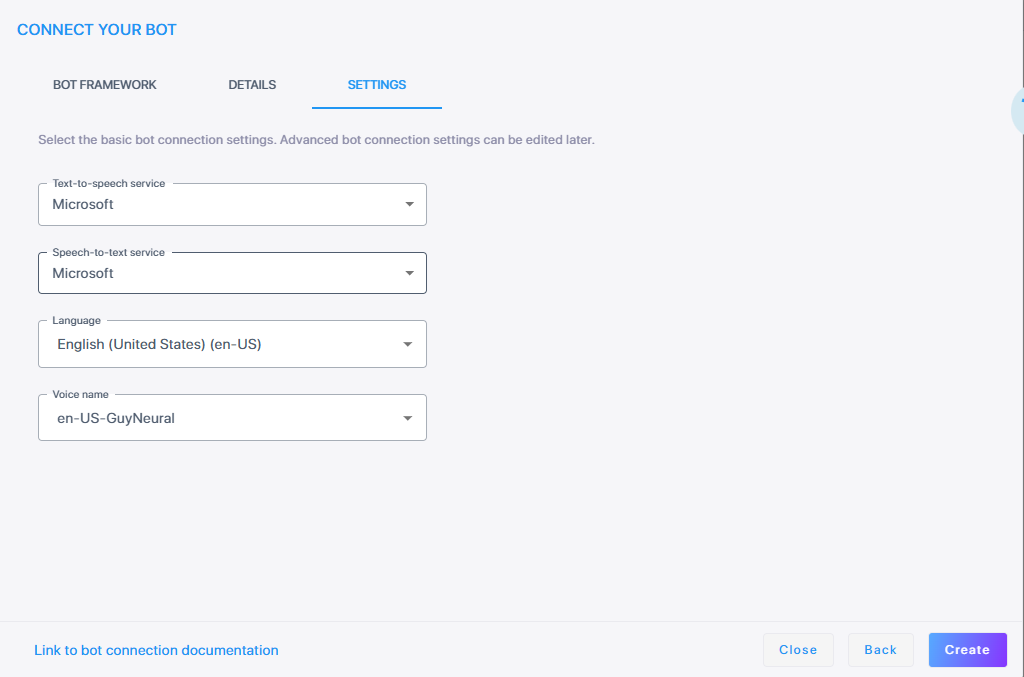
Click Create; the new bot connection is created.
Custom
-
From the Text‑to‑speech service drop‑down list, select Custom.
-
Continue with the steps that apply to the speech provider you configured.
Update Text-to-Speech service
Refer to the sections below for instructions on updating your text‑to‑speech service. When done, click Create; the new bot connection is created.
Microsoft
-
From the 'Text-to-speech service' drop-down list, select Microsoft.
-
From the 'Voice name' drop-down list, select the appropriate voice name.
-
Click Create; the new bot connection is created.
-
From the 'Text-to-speech service' drop-down list, select Google.
For manual Dialogflow bots, you can select any Speech-to-text and Text-to-speech providers from the drop-down lists including defined speech services.
-
From the 'Model' drop-down list, select the speech recognition model (for example, Gemini 2.5 Pro).
Note: If you experience a TTS timeout, consider increasing ttsConnectionTimeoutMS to a value greater than 5000 to improve stability.
-
From the 'Voice name' drop-down list, select the appropriate voice name.
-
Click Create; the new bot connection is created.
Amazon
-
From the 'Text-to-speech service' drop-down list, select Amazon.
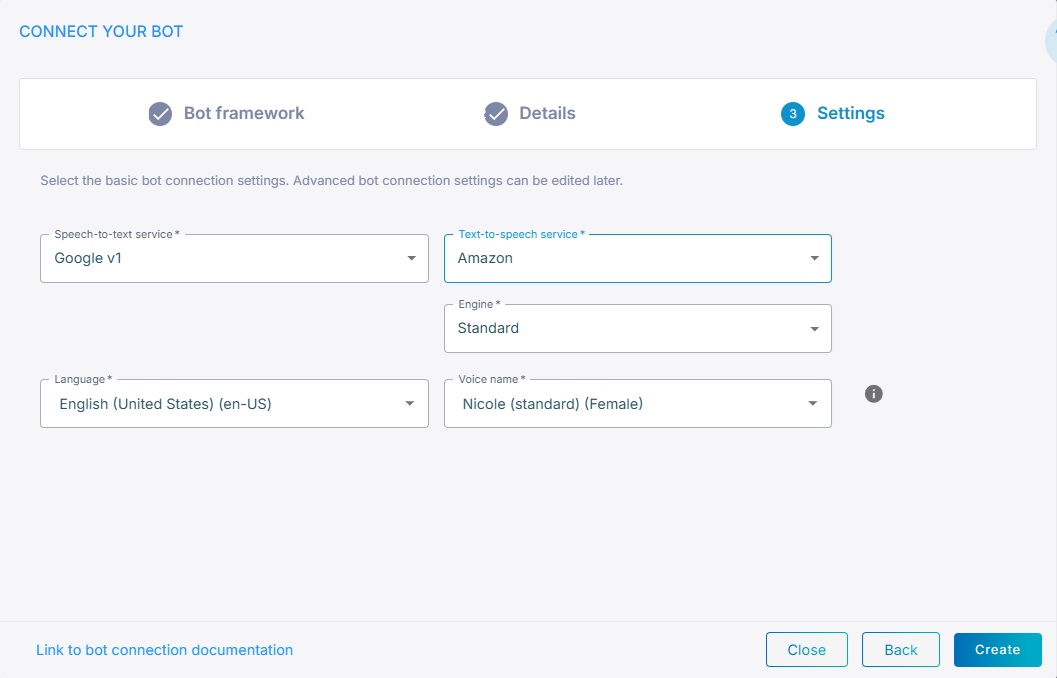
-
From the 'Engine' drop-down list, select the speech recognition engine.
-
From the 'Voice name' drop-down list, select the appropriate voice name.
-
Click Create; the new bot connection is created.
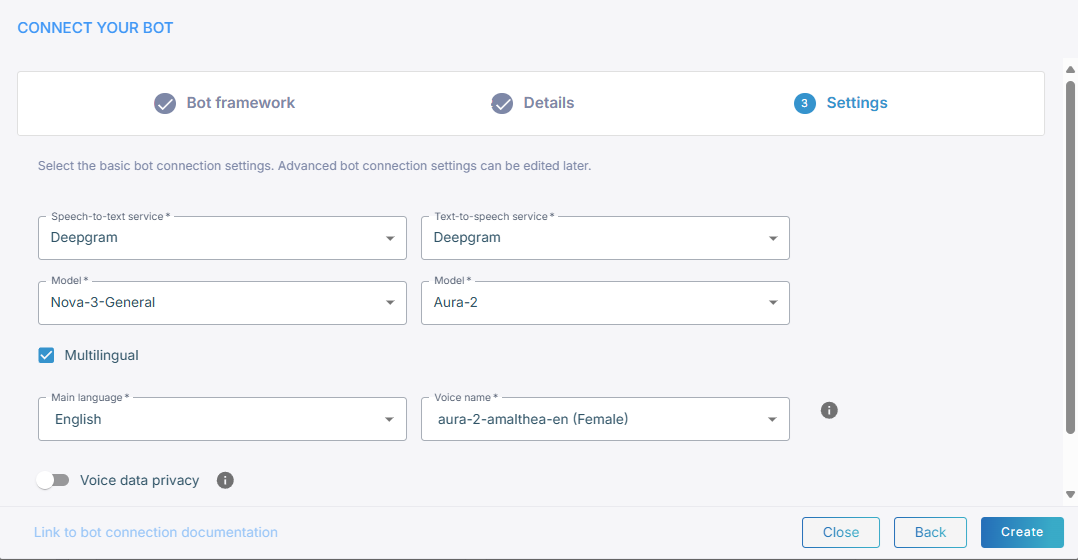
Deepgram
-
From the 'Text-to-speech service' drop-down list, select Deepgram.
For manual Dialogflow bots, you can select any Speech-to-text and Text-to-speech providers from the drop-down lists including defined speech services.
-
From the 'Model' drop-down list, select speech recognition model (for example, Aura-2).
-
Select Multilingual if you need multi-language support. When enabled, a 'Main language' field appears where you can define your main language.
-
If you didn’t select Multilingual, from the 'Language' drop-down list, select the appropriate language.
-
From the 'Voice name' drop-down list, select the appropriate voice name.
-
Toggle Allow Deepgram to use the audio data to improve its models to control whether Deepgram may use your audio data to improve its models. By default, this is enabled. When enabled, Deepgram may use the audio data to support advanced model development in accordance to Deepgram usage terms. Disabling this option will result in higher usage costs.
-
If you want voice streaming, select Enable voice streaming. Selecting this lets Live Hub stream voice directly between the bot and the user, instead of sending text. If you enable voice streaming, the speech-to-text and text-to-speech drop-down fields will no longer be displayed.
-
Voice streaming quires a real-time LLM model.
-
If you enable voice streaming, the speech-to-text and text-to-speech drop-down fields will no longer be displayed.
-
-
Click Create; the new bot connection is created.
ElevenLabs
-
From the 'Text-to-speech service' drop-down list, select ElevenLabs.
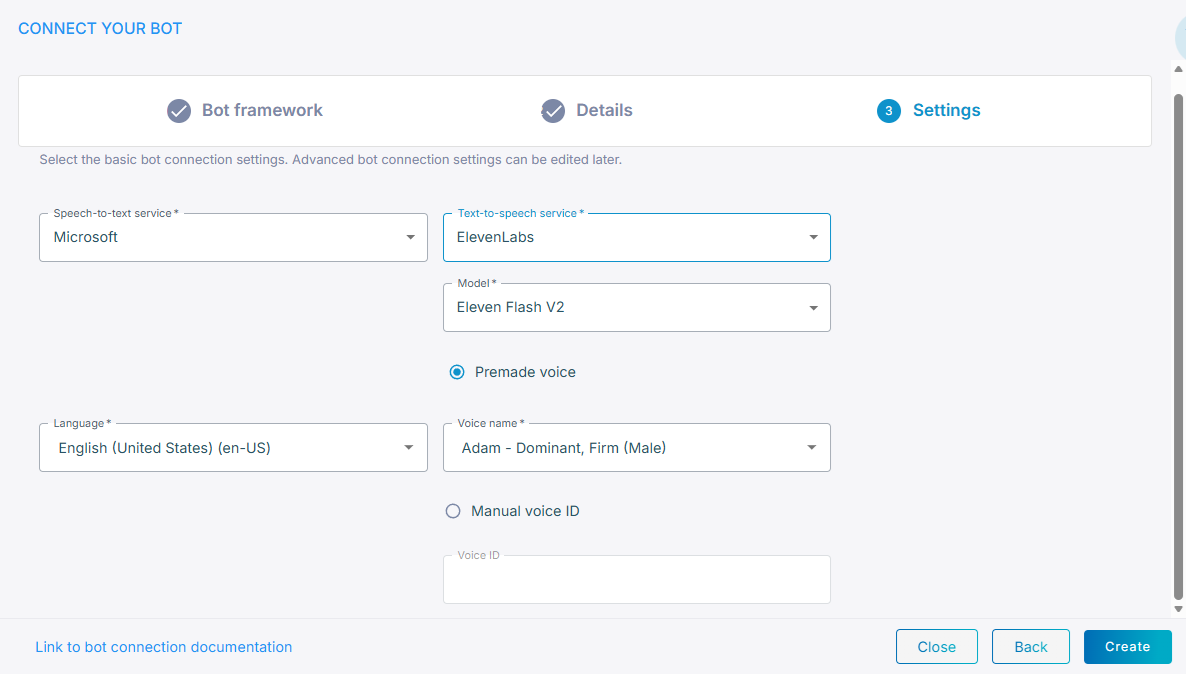
-
From the 'Model' drop-down list, select speech recognition model.
-
Select Premade voice or Manual voice ID.
-
If you selected Premade voice, enter the 'Voice name' that is provided by ElevenLabs.
-
If you selected Manual voice ID, choose the 'Voice ID' that you created.
-
Click Create; the new bot connection is created.
Custom
-
From the Text‑to‑speech service drop‑down list, select Custom.
-
Continue with the steps that apply to the speech provider you configured.
Configure Additional Settings
-
Under the Additional Settings group,
-
Click the Barge-in toggle switch and the DTMF toggle switch to enable these features. For more information, see Managing Features.
-
In the 'Max call duration' field, enter the maximum call duration (in minutes). If the call has not ended by the time this duration elapses, Live Hub ends the call. The valid value is 0 to 43200. The default is 0 (i.e., no limit to call).
The maximum call duration configured for your account can't be exceeded (see Configure maximum call duration). For example, if you configured a maximum call duration of 30 minutes for your account and you configure a maximum call duration of 40 minutes for this bot, Live Hub applies a maximum call duration of 30 minutes to the bot (instead of 40).
-
By default, Live Hub sends specific SIP headers received in the INVITE request to the bot in the start message. However, you can customize this initial message to include additional SIP headers and their values, or even overwrite the value of a specific SIP header that is sent by default. Under the SIP header to Bot group, click Add; the following appears.
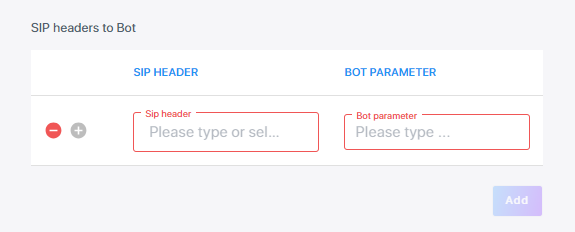
i) In the 'SIP Header' field, either enter or select a SIP header.
ii) In the 'Bot Parameter' field, enter the bot parameter.
iii) Click the blue plus icon to save these fields.
-
-
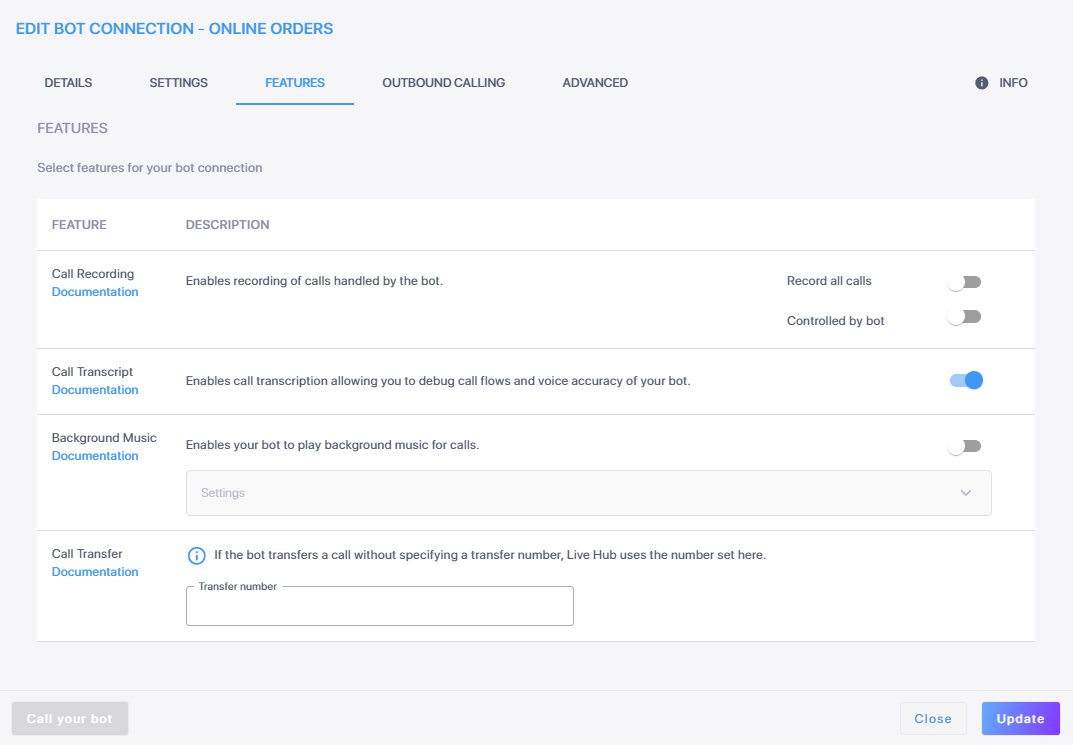
Click the Features tab, and then select the feature for your bot by clicking the toggle switch to turn it on.
-
Call Transcript - for more information, see Call transcript
-
Call Recording - for more information, see Recording calls
-
Background Music - for more information, see Background music
-
Call Transfer - for more information, see Call transfer
-
Failover actions - for more information, see Failover actions.
-
-
Click the Outbound Calling tab- for more information, see Outbound calling.
-
Click the Advanced tab.
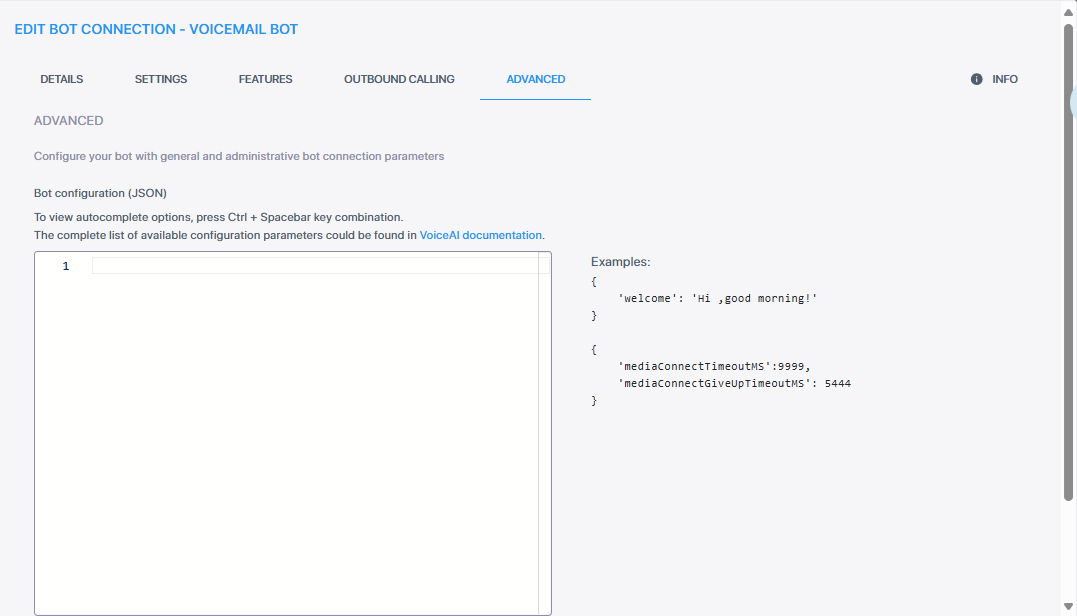
-
You can configure your bot using the JSON editor, see the following:
-
When typing, you can view auto-complete options, by pressing the Ctrl + Spacebar keys. Only if your JSON syntax is valid, does the Update button become available.
-
Click the Info tab to display the bot interface's public IP address. You can add this IP address to your firewall's whitelist. You can copy it, by clicking
 .
.

-
Click Update to accept all your changes, and then click Close to close the dialog box.